Chocolate Peanut Butter Baked Oatmeal
Rated 3.7 stars by 3 users
Category
Breakfast
Servings
6-8
Prep Time
10 minutes
Cook Time
30 minutes
Ingredients
2 cups gluten-free rolled oats
1⁄4 cup cocoa powder
1⁄2 tsp baking powder
1⁄2 tsp sea salt
1⁄4 cup smooth natural peanut butter
3 Tbsp maple syrup
1 3⁄4 cups milk of choice
1⁄2 cup dark chocolate chips*, optional
3 Tbsp peanut butter, for optional topping
3 Tbsp Soom Premium or Organic Tahini, for optional topping
2 apples, chopped into 1⁄4”
2 Tbsp butter*
1 Tbsp brown sugar
1 tsp cinnamon
Pinch of salt
1⁄4 cup gluten free oats
1 Tbsp cocoa powder
1⁄8 tsp baking powder
Pinch sea salt
1 Tbsp smooth natural peanut butter
1 Tbsp maple syrup
1⁄2 cup milk of choice
2 Tbsp cup dark chocolate chips*, optional
1 Tbsp peanut butter, for optional topping
1 Tbsp Soom Premium or Organic Tahini, for optional topping
Baked Oats:
Caramelized Apple Topping: optional
Single Serve Baked Oatmeal
Directions
Preheat the oven to 350 degrees. Line or grease an 8x8 pan. Set aside. (for single serve, use small oven safe ramekin).
In a mixing bowl, whisk together the oats, cocoa powder, baking powder, and sea salt. Once fully combined, stir in peanut butter, Chocolate Sesame Spread, maple syrup, and milk.
If using, fold in dark chocolate chips.
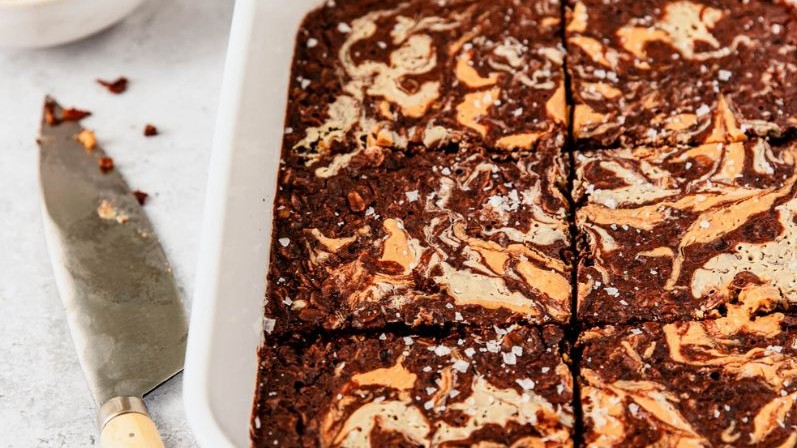
Pour the oatmeal mixture into the 8x8 pan or ramekin. Dollop peanut butter and Premium Tahini over the top then drag a knife or toothpick through to create swirls.
Bake for 30-35 minutes, or until the middle is set. (15-20 minutes for single serve).
While the oatmeal bakes, add the apples, butter, brown sugar, cinnamon, and salt to a small saucepan over medium heat. Cook, stirring occasionally, until the apples are fork tender, about 10 minutes.
Slice or scoop the oatmeal to serve and top with caramelized apples, or fresh berries of your choice. Enjoy!
Recipe Note
Diet: Dairy Free, Gluten Free
*use dairy-free chocolate chips and butter alternative to keep this recipe vegan.
Recipe & Photography: Angelica Oles






M Im
January 20, 2026
Made this for my book club, subbing almond for peanut butter and used almond milk. They loved it!